The Importance of Personalized Home Office Spaces
As more people embrace remote work, the need for functional and inspiring home offices has become increasingly important. A well-designed office not only boosts productivity but also enhances your overall well-being. One of the key elements in creating an efficient workspace is storage. In this guide, we will explore how modular shelving can be a practical and stylish solution, allowing you to customize your office to meet your specific needs.
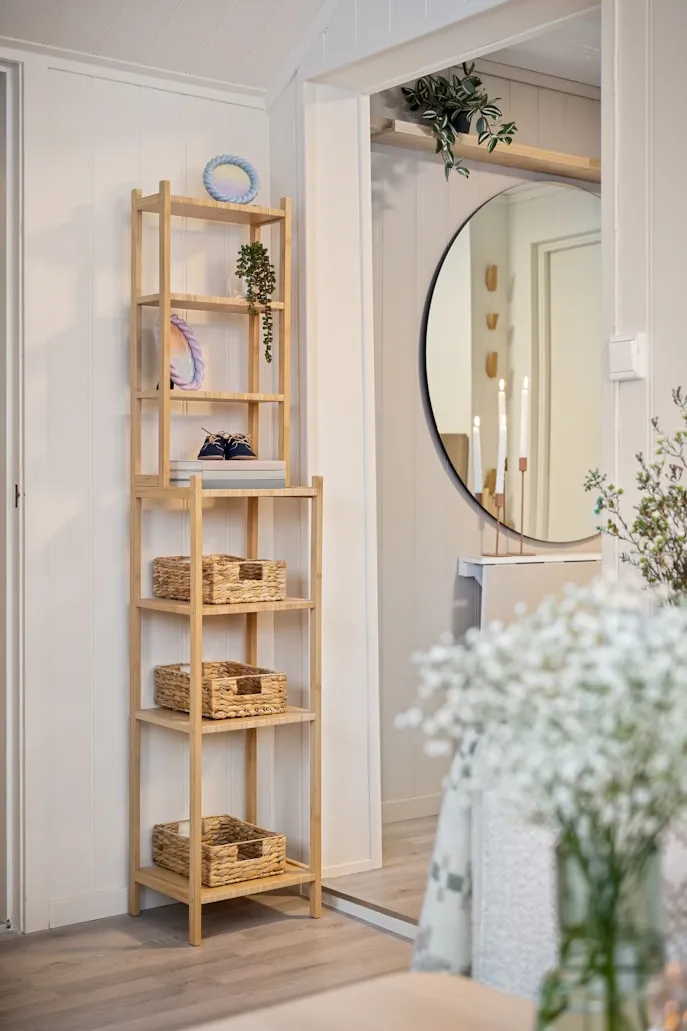
Why Choose DIY Modular Shelving?
Modular shelving offers unparalleled flexibility in terms of design and functionality. Unlike fixed shelving units, modular systems can be easily adapted to different spaces and requirements. Here are some compelling reasons to consider DIY modular shelving for your home office:
- Customizable: Tailor each component to fit your space perfectly.
- Cost-Effective: Save money by building shelves yourself.
- Versatile: Reconfigure the layout as your needs change.
- Aesthetic Appeal: Choose materials and finishes that complement your decor.
Step-by-Step Guide to Building Your DIY Shelving
Step 1: Planning and Measuring Your Space
The first step in creating modular shelving is to carefully plan and measure the space where the shelves will be installed. Consider the following when measuring:
- Height: Determine how tall you want your shelving unit to be.
- Width: Measure the wall space to decide how wide the shelves should be.
- Depth: Think about what items you'll store to decide on shelf depth.
Sketch a rough blueprint of your ideal setup. This visualization will help guide you through the construction process and ensure that all pieces fit together seamlessly.
Step 2: Selecting Materials
The materials you choose for your shelving will have a significant impact on both its function and style. Popular options include:
- Plywood: Affordable and easy to work with, offering a clean, modern look.
- Solid Wood: Provides durability and a natural aesthetic, though more expensive.
- Metal Pipes: A trendy choice for an industrial vibe, these can be combined with wood for added strength and character.
Consider the load-bearing requirements of your shelves to ensure they are strong enough to support books, equipment, or decor items.
Step 3: Cutting and Assembling Components
Once you have your materials ready, it's time to cut them to size. Use the measurements from your plan as a guide. Here are some tips for cutting and assembling your shelves:
- Saw Blades: Use a fine-toothed blade for cleaner cuts on wood or plywood.
- Sanding: Sand edges and surfaces for a smooth finish.
- Drilling: Pre-drill holes for screws or bolts to prevent wood splitting.
Assemble the components using screws or brackets. For added stability, consider attaching the unit to the wall with anchors, especially if you plan to store heavy items.
Step 4: Finishing Touches
The final step is to finish your shelves with paint, stain, or varnish to protect the surface and enhance its appearance. Choose finishes that match your home's decor theme:
- Natural Finish: Highlight the wood's grain with clear varnish or a light stain.
- Painted Finish: Use bold colors for a statement piece or neutral tones for a subtle look.
Apply two to three coats, allowing each layer to dry completely before adding another. This ensures a durable finish that will last for years.
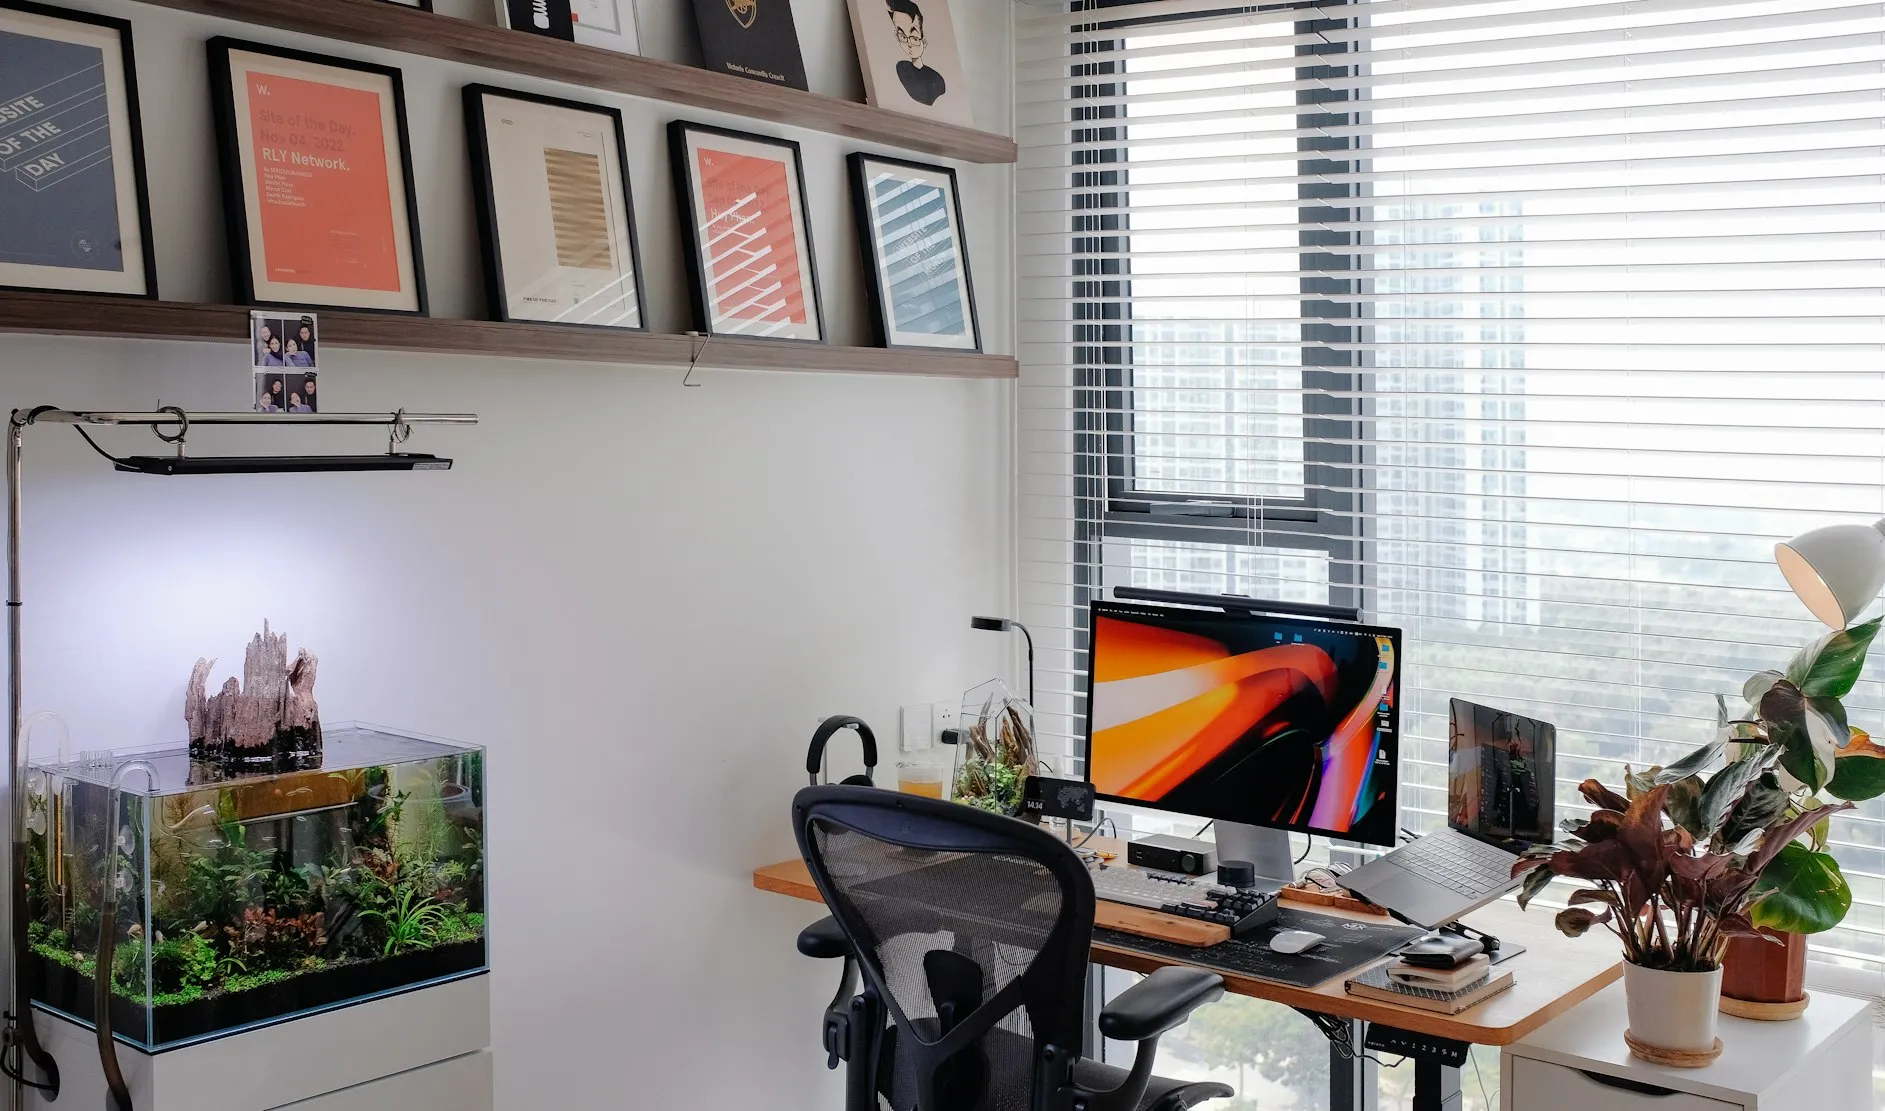
Integrating Shelves into Your Home Office Design
Creating Functional Zones
Your shelving can do more than just hold items; it can also help define distinct areas within your office. Consider these ideas:
- Work Zone: Use lower shelves for storing files, stationery, or electronics, keeping essentials within arm's reach.
- Display Zone: Dedicate upper shelves to personal items like photos or awards, adding a personal touch to your workspace.
Add Greenery and Lighting
Shelves offer perfect opportunities to incorporate plants, which can improve air quality and provide a soothing atmosphere. Additionally, consider adding LED strip lights beneath shelves for ambient lighting, making tasks easier during nighttime work sessions.
A Mini-Framework for Designing Flexible Shelving Systems
This mini-framework will help guide you through creating flexible shelving solutions tailored to your needs:
- Assess Needs: Identify the primary functions your shelves will serve (e.g., storage, display).
- Measure Carefully: Accurate measurements ensure a cohesive design.
- Select Appropriately: Choose materials that align with function and aesthetics.
- Create Modularity: Incorporate interchangeable components for future adaptability.
This framework ensures that whether you're starting from scratch or updating existing setups, you create versatile shelving that evolves with you.