The Art of Choosing a Color Scheme
Creating an accent wall is a brilliant way to add character and vibrancy to any room. The first step in this transformative DIY project is selecting a color scheme that complements your existing decor and enhances the space's aesthetic appeal.
Begin by considering the room's purpose and the mood you want to evoke. For example, warm colors like reds, oranges, and yellows can create an energetic atmosphere, perfect for living rooms or dining areas. In contrast, cool hues like blues and greens tend to have a calming effect, ideal for bedrooms or bathrooms.
Practical Tip: Use Color Theory
Understanding basic color theory can be immensely beneficial when selecting colors. Complementary colors, which are opposite each other on the color wheel, offer a vibrant contrast. Analogous colors, located next to each other, provide harmony and unity. To ensure your accent wall stands out without clashing, choose a dominant color and an accent color from these groups.
- Dominant Color: This should cover the largest area and set the room's overall mood.
- Accent Color: Used sparingly, this highlights architectural features or art pieces.
Selecting a Design Pattern
Once you've settled on a color scheme, it's time to choose a design pattern for your accent wall. Patterns can range from subtle and sophisticated to bold and dramatic. Here are some popular options:
Stripes
Stripes are versatile and can make a room appear taller or wider, depending on their orientation. Vertical stripes add height, while horizontal stripes can make a room feel more spacious. Use painter's tape to ensure crisp lines and uniform widths.
Geometric Shapes
For a contemporary look, consider geometric patterns. These can range from simple triangles to complex hexagonal grids. The key is precision: use a level and measuring tape to map out your design before painting.
Ombre Effects
An ombre effect transitions smoothly from one shade to another, adding depth and interest to a wall. Start with the darkest color at the bottom and gradually lighten as you move up the wall. This technique requires careful blending but results in a stunning gradient effect.
Practical Scenario: From Concept to Execution
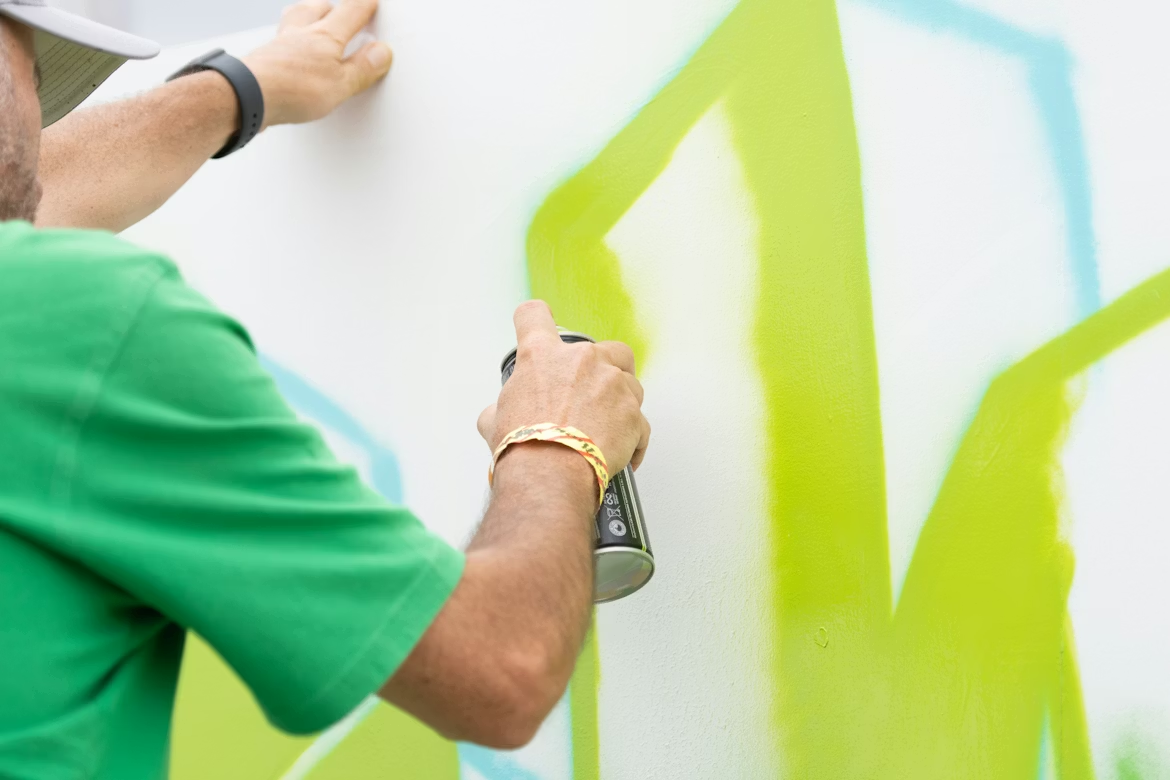
Imagine transforming a bland home office with an energizing diagonal stripe pattern in teal and gold. First, paint the entire wall in teal. Once dry, use painter’s tape to outline diagonal stripes, ensuring even spacing. Paint within the taped areas with gold, let it dry, then remove the tape for a striking contrast.
Preparing Your Wall Surface
A smooth surface is crucial for achieving professional-looking results. Before diving into painting, take the following steps to prepare your wall:
- Clean the Wall: Use a damp cloth or mild detergent to remove dirt and dust.
- Repair Imperfections: Fill holes or cracks with spackle, then sand smooth once dry.
- Prime the Surface: Applying primer ensures paint adhesion and reveals the true color of your paint.
The Importance of Primer
Using a primer is especially important when transitioning from dark to light colors or painting over glossy surfaces. It helps in creating an even base that prevents previous colors from bleeding through.
Painting with Precision
With preparation complete, it’s time to apply paint with care and precision. Here’s how to achieve a flawless finish:
Tools You’ll Need
- Painters Tape: For clean edges and intricate designs.
- Paint Rollers: Ideal for covering large areas quickly.
- Angled Brushes: Perfect for corners and edges.
Step-by-Step Process
- Start with Edges: Use an angled brush to cut in around edges, corners, and baseboards.
- Roll on Paint: Using a roller, apply paint in a ‘W’ pattern to avoid streaks and ensure even coverage.
- Apply Multiple Coats: Allow sufficient drying time between coats for a solid finish.
Finishing Touches
Once the final coat is dry, carefully remove any painter’s tape. Inspect the wall for touch-ups and address any areas where paint might have seeped under the tape or coverage is inconsistent.
Conclusion
Crafting a stylish accent wall involves creativity, planning, and attention to detail. By thoughtfully selecting your color scheme and design pattern, meticulously preparing your wall surface, and painting with precision, you can transform any space into a visually stunning masterpiece. Remember, the key to success lies in preparation and patience—two indispensable tools in any DIYer's toolkit. Happy painting!